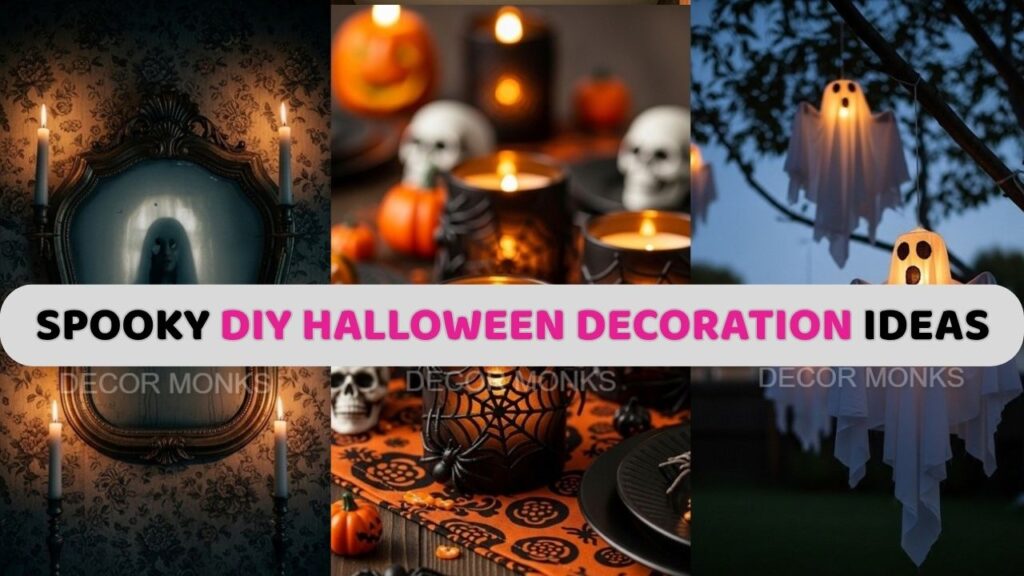
Let’s be honest—Halloween is way more fun when you make the decorations yourself! Whether you’re into spooky, silly, or downright stylish, creating your own DIY Halloween decorations adds a personal, festive touch to your space. I love crafting creepy cobwebs, repurposing thrifted finds, and making things that give trick-or-treaters a little jump. If you’re ready to haunt your house (on a budget), you’re in the right place.
DIY Halloween Decorations
1. Floating Ghost Lanterns That Glow at Night
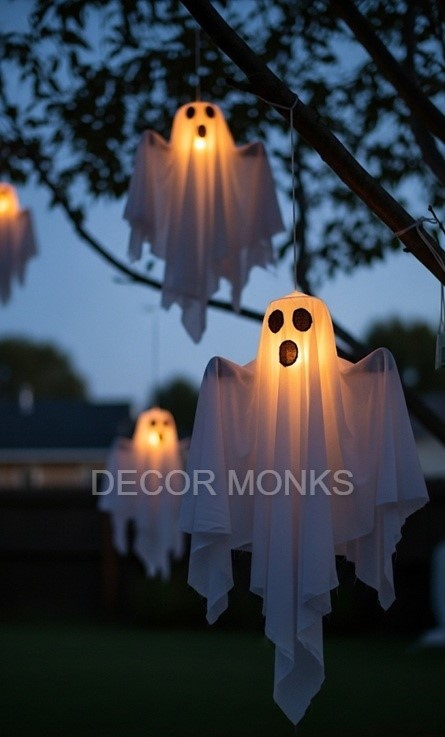
These floating ghost lanterns are spooky and whimsical, making them the perfect porch or garden accent. You’ll start by using white balloons or lightweight paper lanterns, then drape them with cheesecloth or thin white fabric. Add eyes with black felt or paint, and suspend them from a string or invisible fishing line. As night falls, tuck an LED tealight inside or behind each ghost for that soft glowing effect. The result feels like a ghostly parade frozen in mid-air — gentle, haunting, and very Halloween.
2. Creepy Crawly Candle Holders for the Tabletop

Imagine your dining table lit by flickering candles, crawling with spiders. This DIY takes plain glass holders or old mason jars and transforms them using hot glue and matte black spray paint. You’ll create a web texture with the glue before painting over it, giving the jars a raised, eerie surface. Stick plastic spiders all over for that extra creepy touch. When you place a candle inside, the webs come alive in the glow. It’s spooky sophistication with a gothic vibe that even non-Halloween lovers will admire.
3. Haunted Mirror That Follows You with Its Eyes
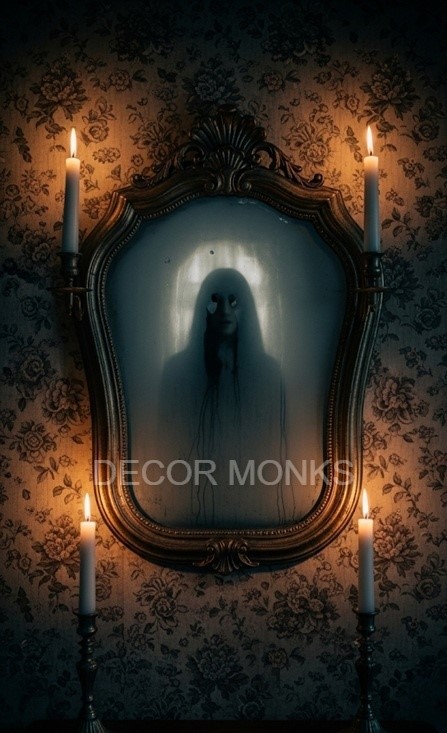
This DIY haunted mirror is next-level creepy. Start with a thrifted mirror or old frame. Print a spooky, faded photo (think Victorian ghost child or shadowy figure), and lightly glue it behind the glass so it appears only when the light hits a certain way. Dust over the glass with diluted black paint or grey chalk to give it an aged, foggy look. When guests walk by and catch a glimpse of the figure staring back, it’s an instant chill down the spine.
4. DIY Potion Bottles with Gothic Labels
Turn your shelves into a spooky apothecary with DIY potion bottles. Reuse old glass bottles and jars, give them a grungy look using black or brown paint, and wrap the tops in twine. Create your own gothic-style labels — “Witch’s Brew,” “Spider Venom,” “Dragon’s Blood” — and stain them with tea for that aged parchment look. These bottles make great mantel or shelf decor, especially when grouped with candles and dried flowers.
Image Prompt: Set of vintage-style DIY potion bottles with hand-drawn labels and aged parchment textures, arranged on a dark wooden shelf with cobweb accents.
5. Spooky Silhouettes for Windows or Walls
Silhouettes are one of the easiest ways to transform a room for Halloween. Cut out shapes of witches, cats, bats, or ghouls using black poster board or thick construction paper. Tape them inside windows or on the walls, and light them from behind. For a high-end look, use backlit LED strips or flickering lamps. You can even create entire scenes like graveyards or haunted forests. The result? Instant spooky drama with minimal effort.
Image Prompt: Window decorated with large black silhouette cutouts of bats and a haunted tree, glowing from inside with warm ambient light.
6. Mummified Door That Greeted Guests with a Scare
Turn your front door into a mummy’s face with a roll of white crepe paper or bandages. Simply wrap the door in overlapping strips, then add large googly eyes or painted ones peeking out between the layers. This DIY is fun, fast, and perfect if you want outdoor decor without investing too much time or money. It’s especially great for trick-or-treat night — every visitor will get a kick out of being greeted by a grinning mummy.
Image Prompt: Front door wrapped in white bandage strips with big cartoon-style eyes peeking out, framed by small pumpkins and lanterns on either side.
7. Witch Hat Chandelier with Floating Candles
Combine spooky elegance with DIY charm by crafting a witchy ceiling display. You’ll hang black witch hats upside down and suspend LED taper candles around them using fishing line. Arrange it above a dining table, hallway, or entryway to create a floating candle effect straight out of a fantasy film. Add faux cobwebs or black tulle for more depth. The result is magical, mysterious, and incredibly Instagram-worthy.
Image Prompt: Floating witch hats and flickering LED candles suspended from the ceiling in a dimly lit hallway, decorated with cobwebs and soft purple lighting.
8. Skull Centerpiece in a Cloche Dome
Nothing says haunted and high-end like a skull in a glass dome. For this DIY, grab a plastic skull, spray it with metallic paint or crackled matte finish, and place it under a cloche with moss, bones, or dried roses. This makes the perfect eerie-but-elegant Halloween centerpiece. It’s perfect for coffee tables, mantels, or entryways where a single creepy item can make a big statement.
Image Prompt: DIY Halloween centerpiece with metallic skull inside a glass dome, surrounded by black moss and dried red roses, placed on a wooden coffee table.
9. Bloody Candle Drip Bottles for an Elegant Scare
For a decor piece that’s both elegant and gruesome, you’ll create blood-dripped candles. Start with white taper candles and red wax (or melt a red candle). Let the wax drip naturally down from the top of each candle so it appears like blood. Place these in antique-style candle holders, or in old wine bottles painted black. Light them during Halloween night and watch the flicker create a gothic horror film effect that’s equal parts haunting and gorgeous.
Image Prompt: White candles with red wax dripping down to mimic blood, standing in antique brass candle holders on a velvet-covered table with rose petals.
FAQs
1. What materials do I need for DIY Halloween decor?
Most DIY Halloween decorations can be made using everyday materials like cardboard, glass jars, string lights, cheesecloth, glue, black paper, and paint. Thrift stores and dollar stores are great for sourcing cheap but useful items for transformation.
2. How far in advance should I start Halloween DIY projects?
Ideally, start two to three weeks before Halloween. This gives you enough time to gather supplies, experiment with ideas, and enjoy the creative process without stress.
3. Can DIY Halloween decorations work for small spaces?
Absolutely. Window silhouettes, floating ghosts, or door wraps are perfect for small apartments or entryways. You can scale designs up or down based on the space you have.
DIY Halloween decorations don’t have to be complicated — just creative and a little creepy.
These 9 ideas blend haunted charm with home decor style, giving your space the perfect spooky vibe.
From ghost lanterns to mummified doors, each piece adds a personal twist to your Halloween look.
So gather your glue guns, string lights, and spooky spirit — it’s time to craft your own haunted home.
Because this year, your Halloween decor shouldn’t just scare… it should wow.